Monthly Archives: March 2013

Prepping a Pineapple

I’m a horrible person. I go on vacation and just forget this blog exists…

Okay, not really. I was mostly just prioritizing sleep over blogging. But not today! (Because today I prioritize sleep over TV-watching.)

So I was in Hawaii. And, as evidenced by my last post, I was freaked the eff out. The flights were awful, as expected (one even more awful than expected, so that was fun), but my friends/compatriots/travelmates helped me through it. Obviously the vacation was worth it. Memories made and all that jazz.

Things I learned while I was away:

  1. I don’t like fish. I mean, I already knew this, but every time I go to a place that is known for its killer seafood, I always try it again just to make sure. Still a big no thanks on that one.
  2. Sometimes, when you think you’re about to die of starvation because you were preparing for a giant all-you-can-eat feast on a boat and then your trip gets cancelled, nothing beats some handmade chips and salsa from that shady dive bar down the street.
  3. It really isn’t fair that there are some people in this world who just get to look out their window and see sea turtles. And then they can look a little farther out their window and see whales. I was one of those people for like half an hour, and you don’t even understand what it was like. It’s just a good thing there weren’t any dolphins in the mix or I would have fainted on the spot.
  4. Beaches are super amazing. That one isn’t very profound or creative, but it’s still true.
  5. PINEAPPLES ARE THE BEST.

Speaking of #5, I learned how to properly cut a pineapple while I was gone! And we made sure to document it for your viewing pleasure.

Step 1: Find a pineapple.

This was way harder than I imagined it would be because I haven’t yet memorized all of those random how-to-know-if-this-one-fruit-is-ripe rules. Is it supposed to be squishy or hard? What color do we want? Should it smell like anything? Eventually we just went for it.

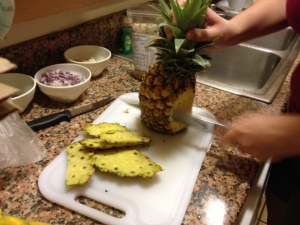
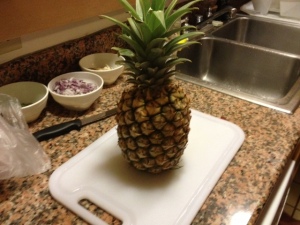
Pineapple 1

Step 2: Start cutting off the hard, non-edible parts. 

Sometimes it’s pretty rough work. Also, that knife is kind of sharp, and I don’t know where the emergency room is, so please don’t stab yourself.

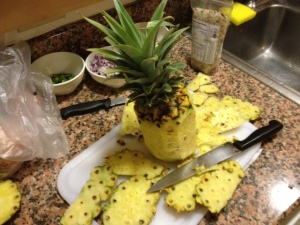
The professor took one half:

Pineapple 2

And I took the other:

Pineapple 3

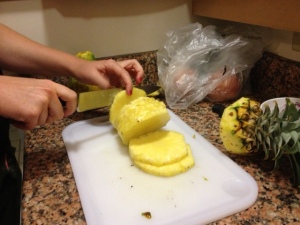
Step 3: Cut into delicious grillable pineapple rings.

Again, please don’t cut yourself because the ER is at least, like, a 30-minute drive.

Pineapple 4

Step 4: GRILL IT. 

There are no pictures of this, as we basically demolished the pineapple in seconds flat. Also, was seriously tempted to wear that pineapple topper as a hat.

The Only Thing We Have to Fear

I didn’t schedule any teaching sessions this week because I’ve been busy having 16,000 panic attacks.

Why, you ask?

Because I’m going on vacation this week! And I’m flying there. And I’m PETRIFIED of flying.

So, instead of learning some random invaluable skill (beatboxing is next, I hear?), I decided I was going to help myself overcome my fear of flying.

The process of overcoming a paralyzing fear usually falls into one camp and one camp only: exposure therapy. Or, as I like to call it, “Knowledge Is Power.” (KIP, for short.)

You can see KIP in action in a variety of different places. One example: last week’s SNL (the one featuring Kevin Hart and Macklemore). There was this skit where Steve Harvey (played by Kenan Thompson) was trying to help his guests deal with their various phobias. Kevin Hart showed up and told a harrowing tale about his fear of horses. What popped out next was a GIANT stuffed horse, and he slowly approached it and managed to pet it—and then it all went downhill when he and Steve Harvey thought they heard it talk.

But the premise stands! The best way to get over a fear is (supposedly) to learn more about it.

NOT GOOD, people. Not. Good.

I’ve spent the last week learning all sorts of airplane facts, reading articles, watching videos…and the only thing I’m sure of is that KIP is not my cup of tea. I much prefer the ol’ Ignorance Is Bliss (IIB) approach. Unfortunately, it might be a little late for that. Maybe I’ll go with sleep-deprivation-in-the-hopes-that-it-means-snoozing-on-the-plane.

For now, I will just get my meditation on and be thankful that I am flying with friends who aren’t as insane as I am.

Speaking of which, as I won’t be back from Hawaii until late Sunday evening, there probably won’t be a post next week. Unless you want SO MANY PICTURES of Kauai.

Tying Shoes

Okay, seriously slacking today, guys. But before you tune out, I didn’t fake-learn how to tie my shoes in the same old around-the-tree shoelace knot of old; I learned how to tie my shoes in a brand new way!

Midge was my esteemed professor for the day. The decision on what I would learn went a little something like this:

While we were at a picnic, plotting ways to kidnap our friend’s adorable niece…

Gigi: So, what have you learned this week?
Me: Nothing yet.
Gigi: Is this going to be the first week you fail at your blog?
Midge: NOT ON MY WATCH. SHOELACES.

I imagine her swooping in via Superman cape or something, but that obviously didn’t happen. Also I probably made up 80% of that conversation. Anywho…

Midge has been talking up this shoe-tying technique for months, but, despite being an all-around amazing human being, she is sometimes lacking in the ability to provide helpful instructions.

The first time she showed us how she ties her shoes, the directions basically consisted of “tie a knot, hold your shoelaces, and recite this magic spell.” No matter how many times we tried to get her to show us what exactly the magic spell consisted of, we just could not get it down. However, after about 10 minutes of trying (which for shoe-tying is a lot), I finally managed to tie one shoe—twice.

Instead of the knot-loop-around-through technique of my youth, this one was more of a knot-hold-hold-grab that eluded me for longer than I’d care to admit. Wait…I already admitted it. Okay, it eluded me for 10 minutes.

Step 1. Tie a knot. This was much more a point of contention than you might realize, as it essentially devolved into me and Midge loud-talking at one another regarding whether this initial step would, in fact, be considered a knot. I think I ended the conversation with an IT DOESN’T EVEN MATTER, so it was never settled.

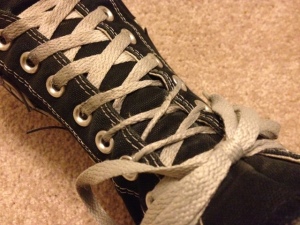
Knot

Sadly, I couldn’t take pictures of the next parts (aka the SUPER IMPORTANT things) because I only have two hands. So use your imagination.

Step 2. Hold the right lace between your right index and middle fingers, and slide the thumb up toward the knot until the lace is parallel with the side of the shoe. See? Pictures would totally help here.

Step 3. Grip the left lace in your left hand so the lace is resting on top of your index finger and thumb. Your remaining three fingers should be holding the excess lace.

If you did this right, your shoelace will now look like an “N.”

Step 4. Do some grab-grab magic. There really is no good way to explain this, so Midge, you are hereby forgiven for your awful teaching technique. If you want to learn, I’ll have to show you in person.

Step 5. Pull through.

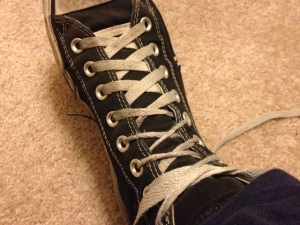
Bow

It looks just like a regular bow! But it took way longer and was infinitely more difficult. Also, please excuse the horrible state of my shoes. I promise I have new ones; I just haven’t laced them yet and am wearing these until the soles fall off.

As an added bonus, I also learned some words in Marshallese while we were trying to convince the adorable niece that living with us would be way cooler than the Marshall Islands: kabbokbok means “clap,” and uma means “kiss.” Those are probably spelled horribly incorrectly. Oh well!

Kabbokbok!